12 Foot Wide Shipping Container
Updated: Jun 21, 2021 | Wide shipping container
Updated: Jun 21, 2021 | Wide shipping container
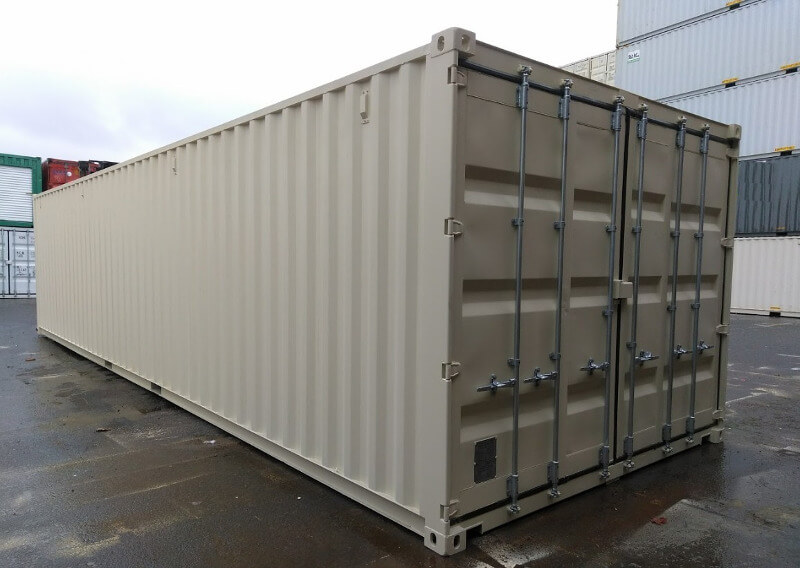
12 Foot wide shipping container? Yes you're reading the headline right, it is a custom built 12 foot wide shipping container that was ordered about a month ago and was completed in 28 days only.
We built this 12ft shipping container for an out of state customer that is going to use it as machine shop.
Before we even touch the container a decision have to be mad. Use one 40 foot high cube container split length wise and fill the 4 foot gap and go from there, or use 2 high cube containers cutting one in half on it's length remove the side of the first container and attach the 4 foot wide section to the container without a side.
The first option would have worked but there well be a lot of modifications to the structure, lots of material needed. front wall panels, roof panels, cross members, decking, door panels and a massive amount of welding. The 12 foot wide shipping container would have not looked as good as we like it to be.
The second option would have worked too with a lot less material needed, but again the container would not looked as good. Add to that the corner caps and 6 foot wide doors needed. we can't have three swing doors.
The final decision came to using two 8 foot wide high cube shipping containers. Each will be cut in length at 6 foot wide. The two sections will be butted together to create a 12 foot wide shipping container.
This way there well be almost no extra material needed except the roof support beams and steel plates to support the cross members. The extra swing doors and be used to extend the 4 foot doors to 6 feet wide. The extra wood decking panels will be used to complete the 12 foot wide floor.
As you can imagin this shipping container modification is going to need a lot of tools. Here is a list of the major tools used to build this one of a kind container.
There will be a lot of steel cutting and the best tool for the job will be a plasma cutter.
With steel cutting comes the cleaning and grinding. We used several dewalt electrical grinder for this job as they are some of the best.
This mod is going to need a massive amount of welding. a really good welder is needed We used a miller 255 to finish the job then we swiched our welders to the lincolin power mig wich is a little cheaper but still a power horse.
We are going to be chopping several 2X2 inches steel tubing and for that we have the one and only evolution chop saw. It gives a perfict and straight clean cut all day long.
These were the major tools for this job. And no job can be completed on time without the a good set of impact/drill. We used the Dewalt set then we switched to the Milwaukee driver kit.
We start by setting up the two containers side by side inside the shop. One door on each container was removed. Left door on the right container and the right door on the left container.
2X2" Steel tubes were used to support the door frame "Door frame top header" and roof from collapsing. Only one section of the decking had to be removed at full length to expose the container under structure.
The front wall panels, roof panels, cross members were cut using a grinder with a cut off wheel to get a straight edge that will be easy to clean and help butting the two containers together.
The side wall panels were removed one at a time using a plasma cutter to speed the proses. These panels and even the top and bottom rail will not be used in this 12 foot wide shipping container modification.
Same thing goes for the front and back corner posts "Removed with the plasma cutter". Luckily the gooseneck was far enough inside so we did not have to do anything with it except extra support.
At this point on the mod. Both containers were cut and ready for cleaning. which is really a tedious job. all edges have to be cleaned from paint and ready for clean weld.
The one thing positive about cleaning this 12 wide container mod is the use of new "One Trip" shipping container. Which means there is no rust to deal with.
On the other hand because the containers are new. The sealant was still a little gooey which is not that easy to remove and cleaning the cross members from the gooey undercoat was not fun at all.
When you think about it. This must have been the most time consuming part of the whole project. The cross members have to be cleaned one at a time. The roof edge which is about 80 feet combined have to be cleaned from paint and it's not a flat surface. It's corrugated so your grinder have to be going up and down for hours.
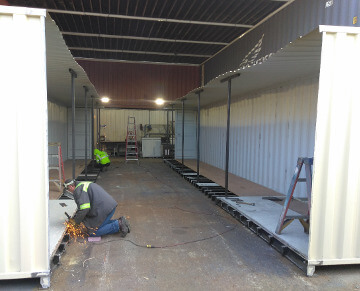
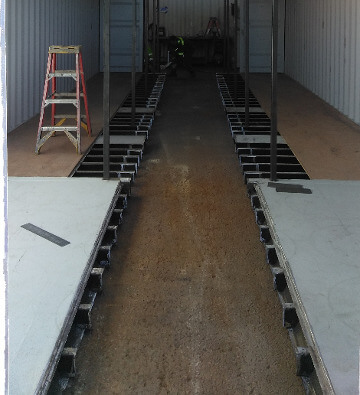
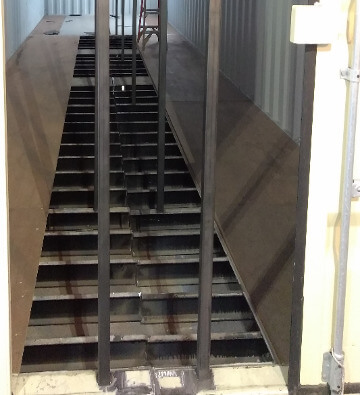
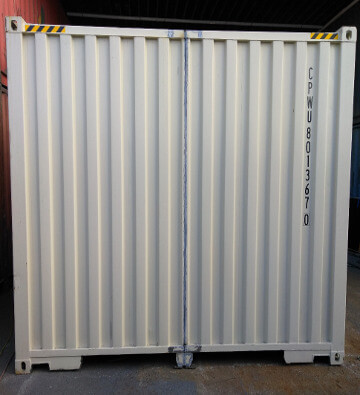
Starting at the gooseneck in the front working toward the back inside this 12 foot wide shipping container we start welding and supporting the under structure.
The gooseneck bottom flanges were plates the whole length. The top gap between the goosenecks was filled with a steel plate and welded al the way around. Grind down and sanded flush.
Each steel cross member was welded and back plated for extra support. Same thing went for the fork pocket assemblies.
Front top header and bottom rails were double plated for extra support too. Rear top and bottom door cell was double plated.
And door frame top corners were supported with 1/4 inch steel plate after squaring the door frame.
A small steel tube was installed on the edges of the container decking to work as a divider between the decking panels. It gives more strength and a better fit.
All the welding on this container modification were done using our miller mig welder before we swich to the lincolin power mig which we really like a lot more than the miller.
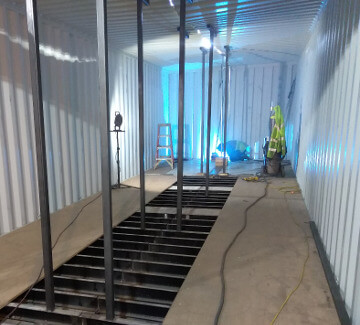
The roof got supported with 2X2 steel tubing going between the top rails spaced at 4 feet centered welded and cleaned. And another 2X2 steel tubing on top of that going the other direction to take the two edges of the roof panels.
The horizontal roof support tubing got a little bush up to give the roof the tiny slant needed to divert the rain and stopping watter from sitting on the roof which can cause rust and leaking down the road.
All weld got the treatment of cleaning, wire wheeled, sealed, primed and painted before the insulation wood framing got started.
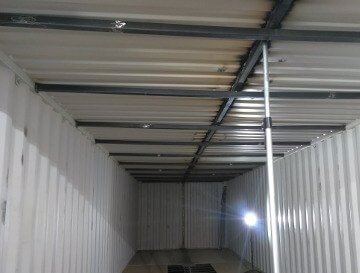
While the 12 foot wide shipping container main structure was being taken care of. The 6 foot wide swing doors were getting built on the side.
Because we decided to use two shipping container for this mod we end up with two extra door that can be used to modify the swing doors needed.
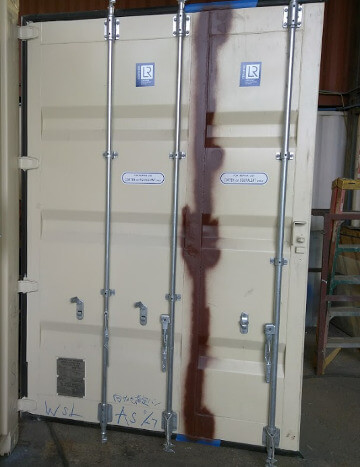
One full height chunk of an extra door was cut off including the door rod assembly and welded straight to the pre existing door while on the container.
The inner door frame is a formed steel tubing on both doors. The only thing is the left door did not have a vertical gasket which makes it a little easier to add to the door.
The right hand door on the other hand took a little more time as the vertical gasket had to be removed before extending the door.
The door gasket were extended to fit the newly built 6 foot wide doors. Gasket were fastened and sealed. All weld got cleaned, sanded, primed and painted.
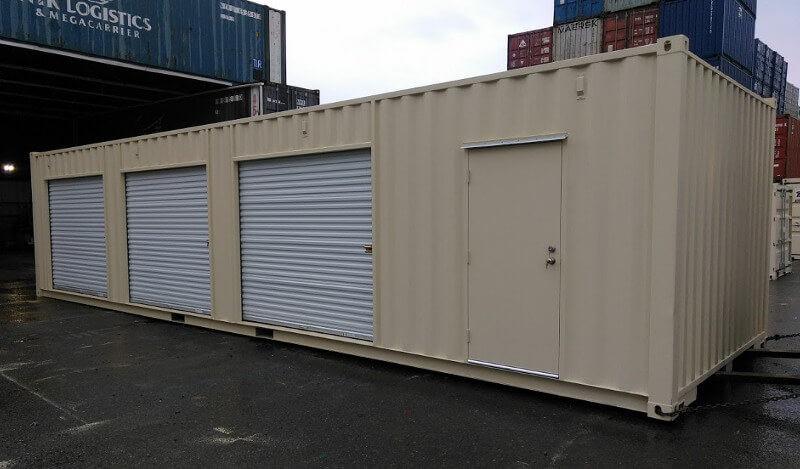
After installing the missing decking sheets the 12 foot wide shipping container itself was done. It was time to start on the roll up and man door. Three 8 foot roll up doors and one man door on the same side.
There was nothing special about installing the roll up doors or the man door on this wide container. One thing we did differently was the steel tubing used for the door frame.
Instead of using a 2X2 steel tubing as all other roll up door frames we built. With this one we went with the 2X3 inch tubing to compensate for the insulation and paneling that's coming later.
Other than the steel tubing everything else was like any other roll up door installation. Same hight and all. One thing though that the customer requested an insulated 12 foot wide shipping container but not an insulated roll up doors.
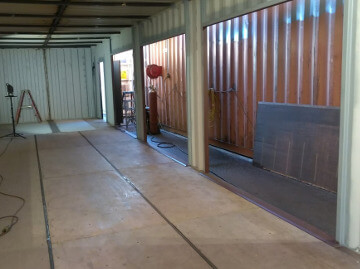
On this wide container we took extra time framing for the insulation. All the 2X4 wood studs got steel brackets welded to the sides and the roof too, to stop any bowing from the studs and the paneling later on.
All the studs were lined up perfectly vertically and horizontally so the paneling will be as straight as it can be without and bending or bowing.
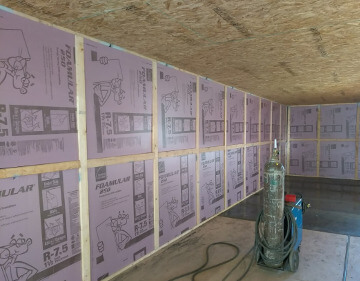
As usual we start with the ceiling, Framing insulation and paneling complete. On the sides it was framing and insulation only at this point because the floor need to be covered with steel sheets.
The floor steel sheets were laid down one at a time. Welded on the seams and fastened to the wooden floor. The fasteners were tack welded too. Cleaned and sanded flush.
After the steel flooring was completed the insulation side panels got installed and sealed all around the container.
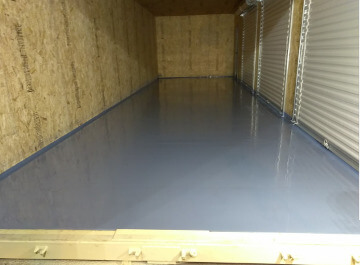
The last thing done to this one of a kind 12 foot wide shipping container was paint the floor. The bottom of the wood panels and doors got masked and the floor paint was sprayed on.
The container sat overnight for the paint to dry. And in the next morning it was ready for delivery.
Another big shipping container modification done on time. Another happy customer.
Copyright: © 2022
Seattle Tacoma Shipping Containers